Showing posts with label Crafts. Show all posts

Friday, March 15, 2013

DIY Growth Chart!

Well, I finally did it! I finally got around to making a growth chart. I've only been meaning to since before my daughter was born. Probably even conceived. Oh well, better than never. It's a good thing I've stayed on top of both of their baby books, so that I can easily fill in the growth chart! 

The best part about this project... it was 100% free! The previous owners of our house had left some wood in the shed, so I didn't need to buy any! And I just used paint and stain we had on hand.


 Plain old boring 6' board that has been sanded. I stained my board and let it dry. While it dried, I printed out my numbers and carefully cut them out so that I could trace them.


I carefully marked out the foot marks and then the inches and hand painted them on in white and grey.


As my marks dried I worked on tracing the numbers along the foot marks and then filled them in with a blue paint.


I am considering adding my children's hand prints to it. It was in my initial plans, but my daughter was napping when this was finished and I wanted to hang it up and see the finished look!


Saturday, March 2, 2013

DIY Love Sign

While scrolling across Pinterest a week or so ago, I came across this fun sign that I just had to make!
I set out to make it right away and I couldn't be happier with the finished product!

I decided this would hang above our bed. Our bedding is white and grey and our curtains are grey. I decided to paint the board white, and the letters grey. And have the hand and footprints be blue, since that's the color of our walls. I think it really pulls everything together in there. 

I took some left over plywood that we had laying around from building a new hatch door to the crawl space... I didn't even have to cut it! Yay! Then I painted it white, with the leftover paint from a previous project.


 It's probably hard to see, but I then printed out a huge "L" and "e" and cut them out then traced them on to my board. 


I carefully had my son place his hand on the board and then had my husband help me with my daughter's feet. I free handed the heart and filled in the letters. Once everything dried, I added some picture frame hooks to the back and called it a day! 


I adore the finished product! We seriously had nothing on our bedroom walls besides our curtains, until now. But I really think this was the perfect thing to go above our bed!

This project was free to us, since we had all the paint and supplies on hand! YAY! 


Friday, March 1, 2013

Cupcake Dress

My daughter's second birthday is coming up and I found some adorable cupcake fabric at Hancock Fabrics a few weeks back. I just had to make her a dress! I don't have a tutorial, but it's pretty easy to throw together for someone who can make a basic dress. I just measured my daughter and made rectangles for the most part. 


For the straps, I used pre-made ruffle stuff I had laying around the house.

The red strips are both about 3 inches wide. and the middle piece I believe was 13 inches... I measured under her armpit, to about where I wanted the dress to hit and then drew out the dress on paper and did the math. That's how I always figure out my dimensions when I freestyle.

There are a lot of tutorials on the web for how to ruffle fabric to make them cinch at the bodice. Next time I made her a dress, I'll be sure to take picture during the process!


I probably should have done the seams down the sides instead of the back and two buttons like her last dress I made. Oops. 


Wednesday, June 27, 2012

Monster Tooth (Fairy) Pillow!

Landon is about to lose his first tooth! I can't believe he's old enough for that. He's getting so big!

 Anyway, I wanted to make him a pillow to hold his tooth (and money) on his doorknob. I am not into hiding it under pillows, especially since he plays in bed for an hour or so before passing out. Who knows where that tooth (and money) would end up! I scoured Pinterest for ideas. I was thinking about a tooth shaped stuffed doll but saw a few monster ones. This picture was my inspiration, but the picture led no where, so I just looked at the picture and ran with it!

( I love his white eye and little teeth! The white eye is a white button with a smaller black on, on top.)

Before I sewed the backing on, I thought about adding arms and legs, but I figure it was suppose to be small... so I decided against it. Now, I'm sort of wishing I had added them. Landon asked me for a BIGGER one, so I will add arms and legs, then. And it'll just be a stuffed animal. :) 

I just used what I had on hand to make this, if I had gone to the store, it probably would have been a bit better. ;) But, it serves it's purpose and Landon loves it, that's all that matters! I do think it's pretty cute, though!


Thursday, June 7, 2012

Emmelyn's New Dress!


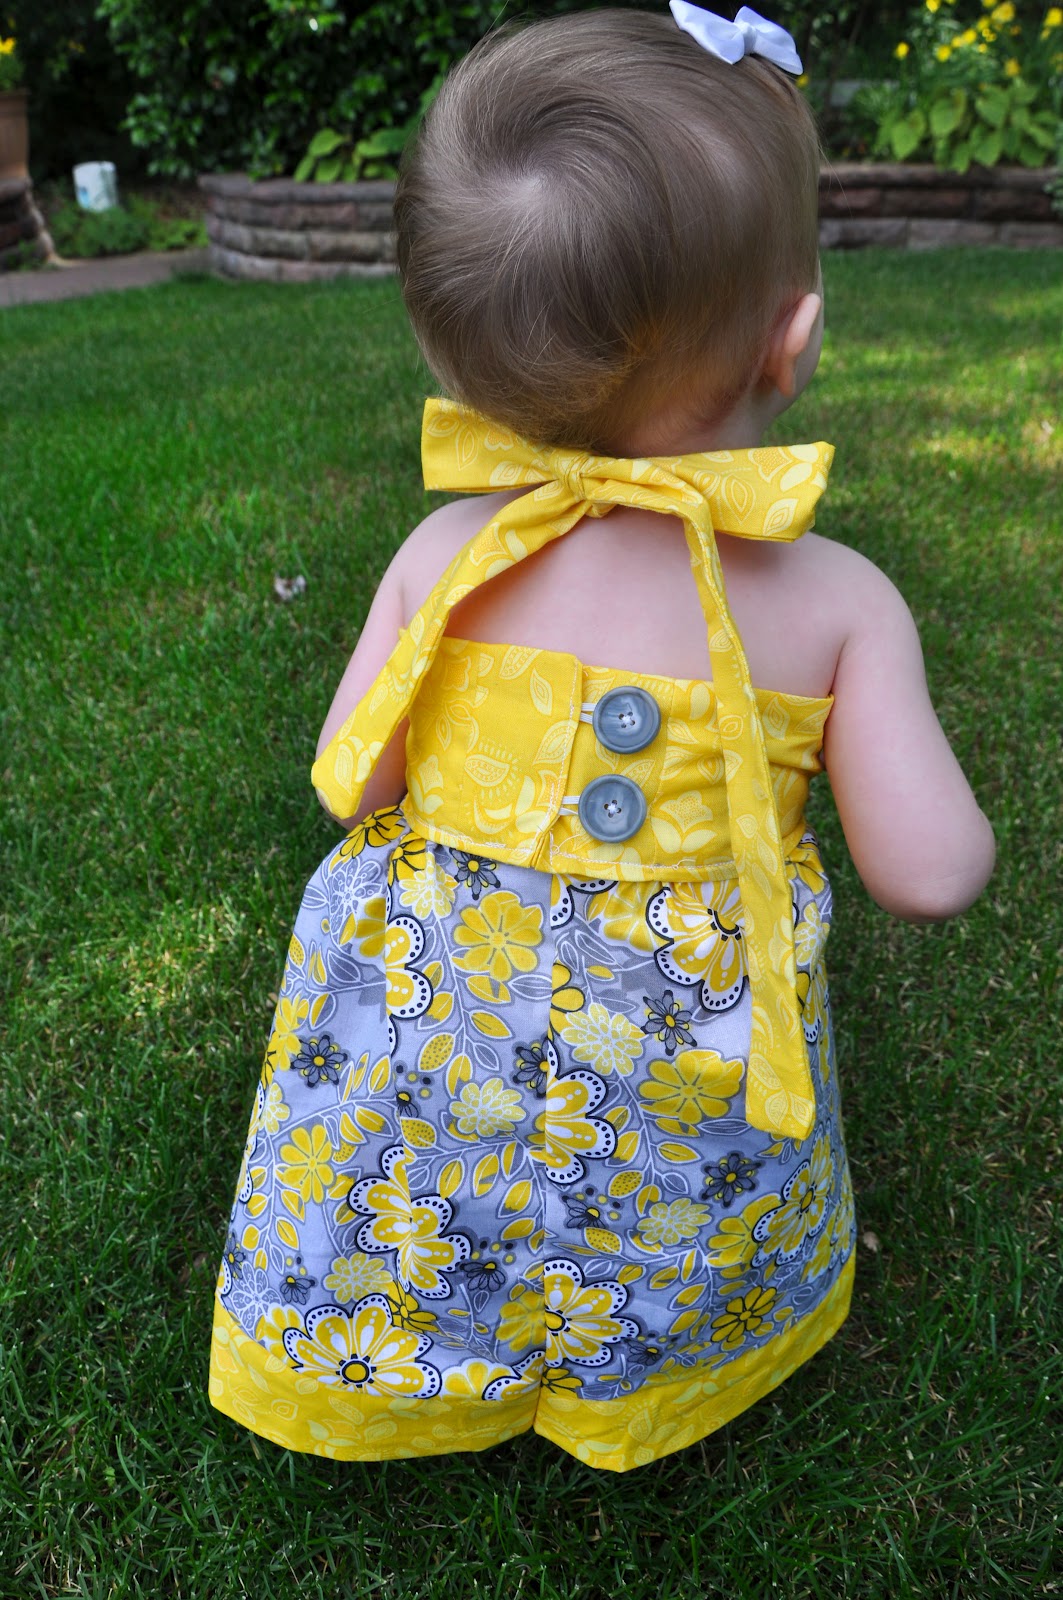
On Pinterest I have a board devoted to sewing! There are so many great ideas out there! While Emmelyn was napping, today, I decided to make her a dress. I haven't used my sewing machine since we PCS'd from Nebraska! After looking through all of my pins, I found a few I liked and opened them. They either didn't have a tutorial or they were an Etsy website to buy them. 

Bummer. 

I decided to do my own thing, and I am so glad that I did. Her dress turned out super cute! 


The neck is like a halter top and is extra long for a great bow!


I decided to add some cute buttons to the back to give it some character!
 

Here's Emmelyn enjoying her new dress!


 I do not have a tutorial on this dress, as I just made it up as I went. But it really isn't too hard to make. :) If I decide to do another, I'll be sure to take pictures during the process!


Sunday, October 2, 2011

Halloween Jars


On Saturday, Landon and I decided to do some Halloween crafts! We took out the Mod Podge and tissue paper and got to work!
He lost interest after we finished the first one and began coloring instead.
Kids...


It was a fun and easy craft!

Sunday, September 25, 2011

Halloween Tutu

A couple of weeks ago, when my MIL was in town, she bought Emmelyn this cute Halloween themed shirt. I loved it so much I decided to make a matching tutu for her to wear for Halloween!


This is my first tutu and I just love it! I made it on ribbon so I can tie it behind her and have a cute little bow! Also, I can add to it when she is bigger. I'm going to have her wear black leggings underneath and I plan to make her a matching bow, too! Very excited to see her in this. She's asleep at the moment. Hmm... I guess I'll wait until Halloween!

Friday, September 2, 2011

Rag Quilt

Well, I finally did it. I finished the quilt that I started over three years ago. Yup.... what a slacker.


I think deep down I was waiting for baby #2 to come around. Yup, that's it.
Well, anyway.
 It's done now, and I LOVE IT!

 These pictures really don't do it justice.


It took me about 4 days of hard work (and a few casualties) to finish the job. I'd say all-in-all about 20-24 hours.

What do you think?
It's not perfect. Afterall, this is my first HUGE sewing project. Usually my projects get done in a few hours, at most. It doesn't have to be perfect. It's mine and it represents my life and the three people I love most! It's definitely something I will always cherish.


Some of these outfits were really hard for me to cut up. For example, the yellow and pink flower one and the teal with flowers. I kept picture my daughter wearing them and how fast she is growing. I do have to admit, this is way better than some outfit sitting in a box for years and years.


The "Mom" shirt Landon wore for my first Mother's Day! (2007) I can't find a picture of it on my computer though. =(


The back side is made out of flannel squares. I already had a yard of each color on hand. The quilt ended up costing about $2. I had everything on hand, but did run out of thread at one point.

Stay tuned for a tutorial blog!

Monday, August 1, 2011

No-Sew Fabric Bows!

Last night, while I was laying in bed trying to sleep, I was thinking about making more bows! I wanted to make a bow out of fabric, but I didn't want to sew it. I love my hot glue gun! So, this morning I tried my hand at it. I was so surprised at how easy and fast this was! Here are the steps:

1. Pick your fabric and cut it to be about 9 in x 4 in. Doesn't have to be perfect, I didn't measure out any of the bows I made today. I only measured this one, afterwards, so that I was able to give directions!


2. Fold up each side to the center.


3. Next, I folded in the edges to make it a little neater in the back. Glue down corners with your hot glue gun!


4. Fold the corners into the center. Glue.


5. Now, you're going to fold the fabric like an accordian, like this:


6. Select your center fabric (2 in x 5 in) and fold like you did in step 2. (As you can tell, my fabric wasn't perfect here, either!)


7. Wrap around the center of your bow and glue.


8. Add a clip of choice or headband. I like to add clips because I can add it to any headband!


Ta-Da! Not too hard! Your finished bow will be about 4 in. x 2 in.


Sunday, July 31, 2011

Fabric Flowers

I have been seeing these "Rosette Flowers" all over the place lately and have been wanting to buy some for Emmelyn, but people charge SO much! I decided to watch a YouTube tutorial video on how to do it myself. I have a ton of fabric just sitting around in storage and I finally put it to good use! I made the little orange one first and I think it turned out pretty good. It's hard to see in this little picture, though. I love the blue one, the colors are neat! I decided to get a little "fancy" with the maroon one and I have to say, I LOVE IT!

All you do is cut a long strip of fabric into a strip that is about 2 inches thick and twist it around itself. Look up a video, it is insanely easy!  

Now you're probably wondering what the pink flower is? It's just a fabric flower, I don't know if it has a different name. For this sort of flower, you need a 4 inch wide piece of fabric. I used about two feet in length, I'd say.

Fold it in half and start threading down the outside edge.

When you're done, it'll look like this. Keep the string attached.

Pull the string and it will start to form this:

Shape it into your flower and stitch the fabric in place in the back and glue a clip on. Add an embellishment, if you'd like!

 Clip the flower onto a headband or directly into your hair. Ta-Da. Super cute right?

My GORGEOUS model!

Related Posts Plugin for WordPress, Blogger...